
Well let's get this crafty ball of creativity started. First tutorial coming up!
The Treat Pouch
This easy little piece of origami has been something I have been teaching for years. In fact it is so easy I have taught 5 year old Rainbows to make these!
To start with you will need a square of paper. It doesn't really matter what size although to start with I would suggest 6" square or 8". These can be readily available as scrapbook papers. For a first attempt I suggest using a bit of printer paper cut to size as the thicker the paper the harder it is to make.

1. Take a square of paper
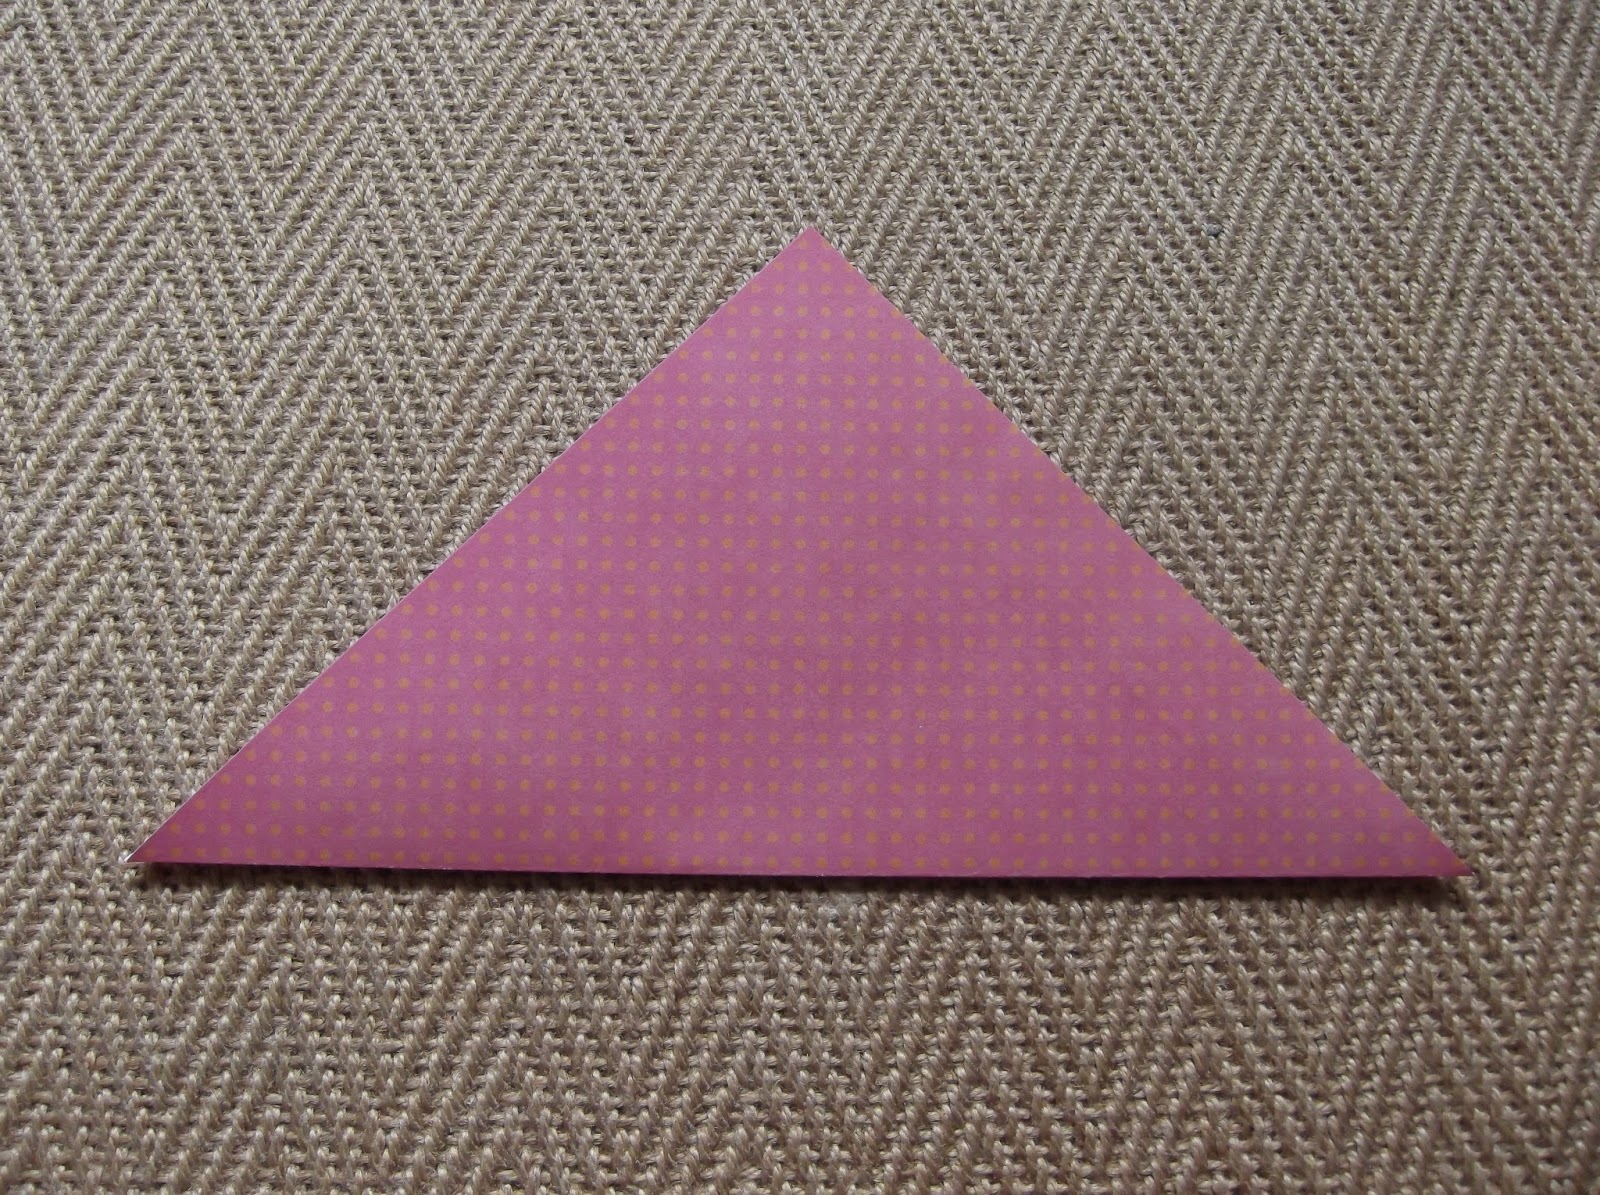
2. Fold the paper diagonally to create a triangle and place it in front of you with the point pointing away from you.

3. Take the bottom left corner and fold it up so that the touches the opposite side and the straight edge is parallel to the bottom of your paper.

4. Now fold the opposite corner up so the point touches the opposite corner and the corner of your previous fold. The straight edge should also now be flush against the last fold you made.

5. Take the top point of your paper and fold it down over the last two folds. You could use double sided paper so that there is less white.

6. Carefully, using your finger or a bone folder, push the base upwards so that it makes the pouch more 3D.

Here is a close up of the way the base should look.

7. Now you can decorate the pouch. Here I have cut out a variety of flowers with my sizzix and added a crystal embellishment in the centre. I used foam pads to add dimension and curled the petals slightly.

Here is a close up of the flower!

Now you can fill your pouch with goodies! Why not punch holes in it and hang it up?
Edited - 13th January 2016
Here is a video to demonstrate how to make this pouch
So now it is over to you! why not have a go and send me your pics and I will post them here for all to see!
Happy crafting
xxx
In order to add your photos why not try my new Link-up tool. Click on the link below and follow the instructions to add your link to your webpage, blog or you can just upload your image!
Lovely Jen, keep up the good work!
ReplyDeleteThanks so much Caroline! Hope you will keep popping by to say hi! I'm sure there will be a few tutorials just right for your eldest coming soon!!! xx
ReplyDeleteI love origami - thanks for the instructions :) they are really clear and easy to follow
ReplyDeleteThanks so much. I love doing demonstrations and this one is always a popular time filler! x
ReplyDeleteOh very clever! Great for parties or you could use it to make mini Christmas tree gifts x
ReplyDeleteLovely tutorial. Thank you
ReplyDeleteThank you so much ladies. I have used them as advent calendars before, one for each day, filled with treats!
ReplyDeleteLovely PIC Jane! So great to see the online tutorial works! Loving the paper you used! Xxx
What a clever idea. They would be great for party treats or wedding favours. I'm bookmarking this. It would be a lovely way to give end of year treats in the school where I work.
ReplyDeletehello jenny, Welcome to the blogging world, I can't wait to see what else you have for us! I used to make these years ago and had completely forgotten, mine were flat though and I used to put them on cards, if I can dig out a photo I will add it to your gallery. Thanks for the clear tutorial and reminder.
ReplyDeleteI love how yours stand up, a bit like very classy Macdonalds chip pouches!
What a lovely tutorial, I'm sure my daughter will love some of these pouches for putting her stuff in.
ReplyDelete