Wednesday, 25 March 2015

Whatever Wednesday - Abbotsbury Sub Tropical Gardens

We are so lucky to have some wonderful attractions close to where we live.  One in particular is the beautiful sub-tropical gardens in Abbotsbury.  Situated close to the incredible Chesil beach (this will have to be a post all on it's own!!)

Abbotsbury actually has three great attractions in such a small beautiful village.  You can visit the children's barn where you race goats, cuddle guinea pigs or play in the large soft play (at least that's all my youngest wants to do each time!!)  There is also a Swannery where you can see Swans nesting, feed the thousands that flock there or even see where part of one of the Harry Potter films was filmed!

We opted to visit the gardens last weekend however, a quieter option we felt! I have to say we picked a wonderful day to go, not only was the weather pleasant and even warm in the sun but the flowers that were coming out were stunning!  Camellias, Azaleas and the wonderful Magnolias were among the beautiful sceptical!


 There is also a Kookaburra sanctuary in the gardens and their raucous laugh can often be heard as you wander around!

After spending some time soaking in the wonders and of course playing hide and seek it was time to head home.  

Don't those flowers just make you smile?  They did me, so lovely!

If you want to visit Abbotsbury Gardens or any of their attractions I believe it is well worth buying your tickets online as you can save a great deal if you buy a few days beforehand.  You can also apparently use Tesco vouchers to buy tickets now!  We have a season ticket so we love to just pop in for a wander every now and again.

One thing I will say however, if you have little ones and want to visit the Swannery or barn they only open for 6 months of the year (the gardens open all year round).

Have you been anywhere fun recently or seen such lovely spring wonders?

I'm going to linky with Happy Friday if you fancy popping round and seeing what other bloggers have been happy about this week! 

xxx

Monday, 23 March 2015

Markers - Which one???

This week, among other things I have been contemplating my markers!  (as we all have to lol)  I currently have four different types of pens to use when illustrating, these are Promarkers, Spectrum Noir, Sharpies and the new First Edition pens.

I love using markers generally and each have their advantages and disadvantages so I thought I would do a mini review (my first!) Many of you may already have a preference and already have a pile of pens at your disposal and if you have any views please do comment below.

The thing all these pens have in common is that they are all alcohol markers, This means they are permanent.  All except the Sharpies are double ended to give you options for line thickness and coverage.

The alcohol ink generally dries quickly but things to watch out for are that you can't just colour on any old paper or card unless you use something underneath the protect the surface.  Alcohol markers can bleed terribly so it is best to use either good card or paper designed for use with them.  The papers are usually one sided and won't bleed through but they produce beautiful colours so it is well worth getting!
Another marker tip is that they should be stored on their side, I find this particularly important with Spectrum Noir, I will explain later!

Right well let me introduce you to the pens in question!

    1. Promarker, 2. First Edition, 3, Spectrum Noir, 4,Sharpie

Promarker Pro's
  • Comfortable size to use despite being the widest pen.
  • Good coverage, You can colour over and over while the ink is still wet and the colour will not darken which means larger areas will end up all the same colour rather than being able to see pen marks like standard felt tip pens.
  • If you wish to add another colour to say produce a shadow this can be done with a similar shade drawn over the top, this won't effect the pen nib of the other pen and discolour it for future use (think of how discoloured yellow felt tips go!  none of that!)
  • I have not had any leakage problems with any of my promarkers
  • If you run out of one colour or need a particular one you can buy the main range singularly which is really helpful.
  • Of all the markers they are the truest colour match to the packaging
  • You can buy adapters to make ultra fine lines (come in a pack of 3 nibs) These are wonderful for intricate work.  They are not interchangeable so you will need to decide which pens to use them with (I have one on my black)
Con's
  • Colours aren't blendable, this actually doesn't bother me much but it can be annoying sometimes if you are trying to create more of a gradient.  There is a blender pen which will blend the colours for you but so far it has been disastrous for me so need to practise more!
  • Promarkers are generally the most expensive of all the pens, 
  • Although this can be an advantage too I find it frustrating that they release limited edition pens, these are usually really lovely and I want them all but once they run out they aren't easy to replace.  I have a fav brown in particular called Tawny Owl, I will be sad not to replace it when it runs out (and I use it alot!)
  • Colours of the pens are on the sides rather than the ends (except in newer versions) this make storage a problem.
First Edition
Pro's
  • These lovely pens have good coverage and colours are vibrant
  • Not too costly to buy, currently Hobbycraft is the only supplier.  even my wholsaler who make them aren't selling them which is odd.  I can only find them in packs of 5 so no singles ones as far as I know at the moment.  The advantage of these sets however is that they come in themes so if you are after skin tones you can buy them in a set and you know they will compliment each other.
  • Both ends are great sizes for both intricate and large areas. 
  • These are likely to be on offers like Spectrum Noir often are, I bought two packs for £15
Con's
  • Not easily available at the moment
  • Can't buy separately
  • The colours aren't quite the same as the packaging suggests, you will need to either test before you commit to your work or create a chart so you can see the finished colour.
  • They currently don't have too large a range (this could actually be an advantage if your as bad as me and want the whole range but can never afford it!)
Spectrum Noir
Pro's
  • These pens are sold in either large packs of 24 or smaller 6 packs.  The 6 packs often seem to be on offers which is useful and the big packs (normally around £20) build up your pen stash really quickly
  • The shaft of these pens are around the size of the Promarkers but rather than round they are hexagonal.  This is great if you struggle a bit with your grip.  They also have non-slip sections for comfort.
  • Both ends are great and like the other two the fine tip is great for more intricate drawing.
Con's
  • Store them on their side!  I stored my older models upright and found that they leaked.  They seem to have improved the design however with the newer version but I would still store them on their side just in case!
  • The colours aren't true to the ones on the pen lids, you will need to experiment a little before using.
  • These pens can look streaky if you don't colour consistently over the surface.
Sharpies
Pro's
  • Cheep! and there are some great colours available now and they are often on offers so worth looking around!
  • These work fantastically well on other surfaces, all the other pens can look a bit bleached on other surfaces but Sharpies hold their colour well on all sorts including china and glass!
Con's
  • Not many colours so creating shadow effects are limited
  • The nib isn't very fine so don't use for really intricate work.
Over all, I much prefer the Promarkers, despite being more costly they colour beautifully even on larger projects and each colour (despite limited edition pens) are easy enough to replace! They are comfortable to hold and for me the most important thing is that the colour on the pen is pretty bang on with the colour you will get!

One tip I will pass on to you is when using a thin black pen to create your drawing before colouring in! I am not sure of the science behind this but I have discovered that you do not want to use permanent pen or ink  for the outlines (this may sound contradictory) But you will find that the markers will smudge the ink if you do, no matter how long you have left them to dry. I tend to use a pigment ink but despite this I am always careful when colouring over lines!

Now, with all these pens, I am faced with a total problem!!!


How on earth do you store them?  

To be honest I haven't really conquered this problem.  I have created a promarker system from scrap paper, but in practise it isn't quite as practical as I had hoped!!!


I will have to have a rethink I think!  

If you use markers how do you store yours???

Well if you got all the way to the bottom of this post then thank you!  I thought that I would share a little game with you that I play on my fb page.  
This is a Crafty What-bat and is a puzzle which, when solved, should reveal the name of a blog! (on fb they are of fb pages!)

Can you guess who this first one is of??? 


I apologise for there being a missing word at the end so see if you can work it out!

Hope you all have a wonderful week, I'm off to Handmade Monday.  See you there!

Friday, 20 March 2015

Happy Spring Friday

It's funny, but up until this week I hadn't really felt warmth in the air.  The bulbs have been flowering on and off but other flowers are starting to emerge, especially blossoms, Now it really does feel spring like!

This week I have been making a few trips to buy plants.  The garden has been very abandoned for a few years and although each year I try to do a little I never seem to make much of a difference.  This year I think I am nesting! With only 3 and a bit months to go I keep busying around trying to make things look nice.  I also want my youngest to be out the house more and as she is now 2 I figure the garden should become a safer place for her to wander in and out of when the weather improves more.

Since a child I have loved pinks and I bought this adorable one to pot up. We did it together... actually I planted and she waved the watering can around but I like to think of it as a team effort!


Another thing that made me a happy this week has been getting stuck into some illustrating which I was asked to do ages ago for a very talented poet. I hope she won't mind me sharing these pics to see what you think!


Two older ladies who are distinctly young at heart having fun on the beach!

If you missed my decoupage tutorial do pop back and see what you think! I've really enjoyed decoupaging this week, glue and paper everywhere but what craft is fun when there isn't a little mess??

Well I am off to link with Planet Penny and Happy Friday, hope you can pop round too and see what else people have been up to! 
xxx


Wednesday, 18 March 2015

Whatever Wednesday ~ Decoupage tutorial

After so many of you liked my last post I thought I would share a little tutorial with you to make this really cute candle holder.


As it's so close to Easter I chose some Easter papers!

To make this candle holder you will need ~ 

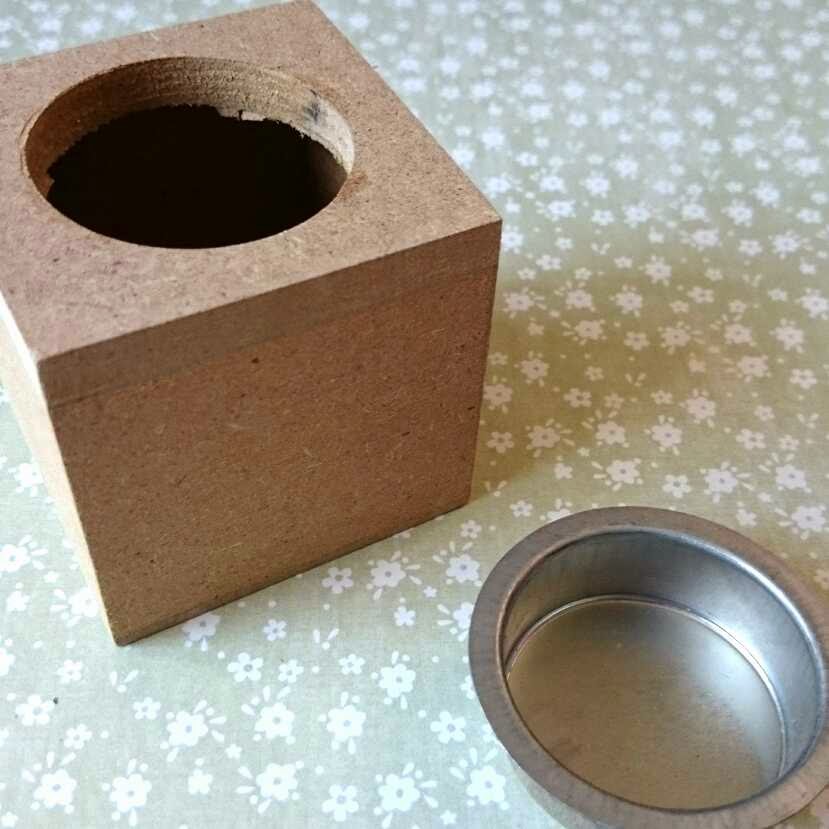
A wooden blank, Deco Mache papers, Deco Mache glue and a paintbrush.


Step 1 - Remove the candle insert


Step 2 - Take one sheet of your paper (there are 3 in a pack) and tear it into little pieces (do not cut, the torn edges help the pieces  stick better and blend more effectively)


Step 3 - Choose which side to start with and cover with glue.  The surface of these candle blocks is quite porous so you may need a couple of coats of glue.


Step 4 - Start to stick your pieces down.  Every time you add a piece cover in glue (don't go too made though or it will buckle the paper)


Step 5 - Cover the side with paper.  As you can see I have overlapped the paper so that all the edges will be covered.


Step 6 - when you encounter corners my top tip is to place your piece so that the edge of a piece sticks right up to the point like this image.  You don't want to have too much paper to fold over so this way you will get a neat fold.


Step 7 - turn your block around and start to work on the next face.  Here you can see the edges from the side I just completed hanging over.


Apply glue and stick the edge pieces down first.

Step 8 - cover this side and then work your way around the cube.  Don't do the top or bottom yet.


Step 9 - I used the metal candle cup as a stand for my holder to dry.  This will also stop the papers curling underneath and sticking where we don't want it before we are ready.


Step 10 - Once the sides are dry start to stick the top edges down and then add pieces to cover.  It doesn't matter if you aren't too neat around the hole as this will be covered by the cup. 


Step 11 - Place your candle cup in place.  This will also protect the top while you work on the bottom. (you may need to bash it a bit ( something large and flat so you don't get dents in the cup.  this one fitted in quite easily but the butterfly ones in a previous post didn't so needed persuasion!)


Step 12 - When working on the bottom I made sure that I didn't cover the warning label.  I did consider trying to remove it and then put it on after but was worried it would tear.  I also considered covering it completely but thought Warnings should be left to be read so I papered around it!


Lastly just let it dry completely before using! 

I do have a few Deco Mache supplies in stock if anyone is interested.I don't have much in stock but I can get hold of some lovely papers and blanks to decorate, please don't hesitate to ask if there is anything you would like.  Click here for a link to what I currently have in stock.

Well I hope that you have a wonderful Wednesday!

xxx


Monday, 16 March 2015

Decoupaging my way through a few jobs!

Well as it is Handmade Monday I thought what a good time to show you some of my latest little crafty moments (to be honest I only finished them this morning!!!) 
Do you get asked to do a few jobs (when you have time) or put things by and say 'I will do that one soon!'  Well this morning was an attempt to finish a few jobs.

My lovely friend (and Joe's mum) asked me to make a couple of clipboards for her two boys.  Can you tell which one is for Joe??


I bought these tea light holder blanks some time back but never got round to doing them up, I loved the butterfly paper.  I do find this new decoupage odd if I'm honest, you rip it up into little pieces before sticking it down.  I was so worried that all the pretty butterflies would look silly, but it is odd how you can still see them.  I really like these ones now.  I think some papers work better than others so it is worth having an experiment!


This little box is another wooden blank I bought to decorate but just hadn't got round to yet.  I only did the lid and I think I may keep it at that, I like the contrast and the grain in the wood looks rather nice.  What do you think?


Lastly I fancied having a go at a pencil case.  I can never find my pencils or pens so thought putting them in a special place would be the answer!! I thought doing all of it would be too much so left the sliding section plain (I also thought that the sliding movement may ruin it in time so best left clear).


Have you tried decoupage? It is funny how crafting has moved on so far isnt' it, I always thought it was just cutting out lots of images and layering them on top of each other with little dabs of 3d glue!  But it now also seems to cover decorating items and furniture etc with lovely papers!

Well what have you all been up to?  I'm off to linky with Handmade Monday so hope to see you all there! xxx

Saturday, 14 March 2015

Happy Friday ~ mmmm possibly

Well, if I'm honest it's been a long week and I wasn't going to post as I was really stuck for a happy thing to show you (not that it was a miserable week, just no pictures to show).  However something just happened that really did make me very happy!  
As most of you know (think I may talk about it often enough) I create mystery crafty postal boxes and back in October I asked some lovely bloggers to review my first boxes.  Well one of these guinea pigs has become a regular customer and this month she took a video of the big unveil!  
It was just so wonderful to watch someone else opening a box.  I spend so much time preparing them but I never see them opened and it was a wonderful yet slightly surreal experience!
The video is around 22 mins, but she really does go through everything, 


I don't seem able to add the actual video to embed into my post but if you click the image it should take you directly to the video.

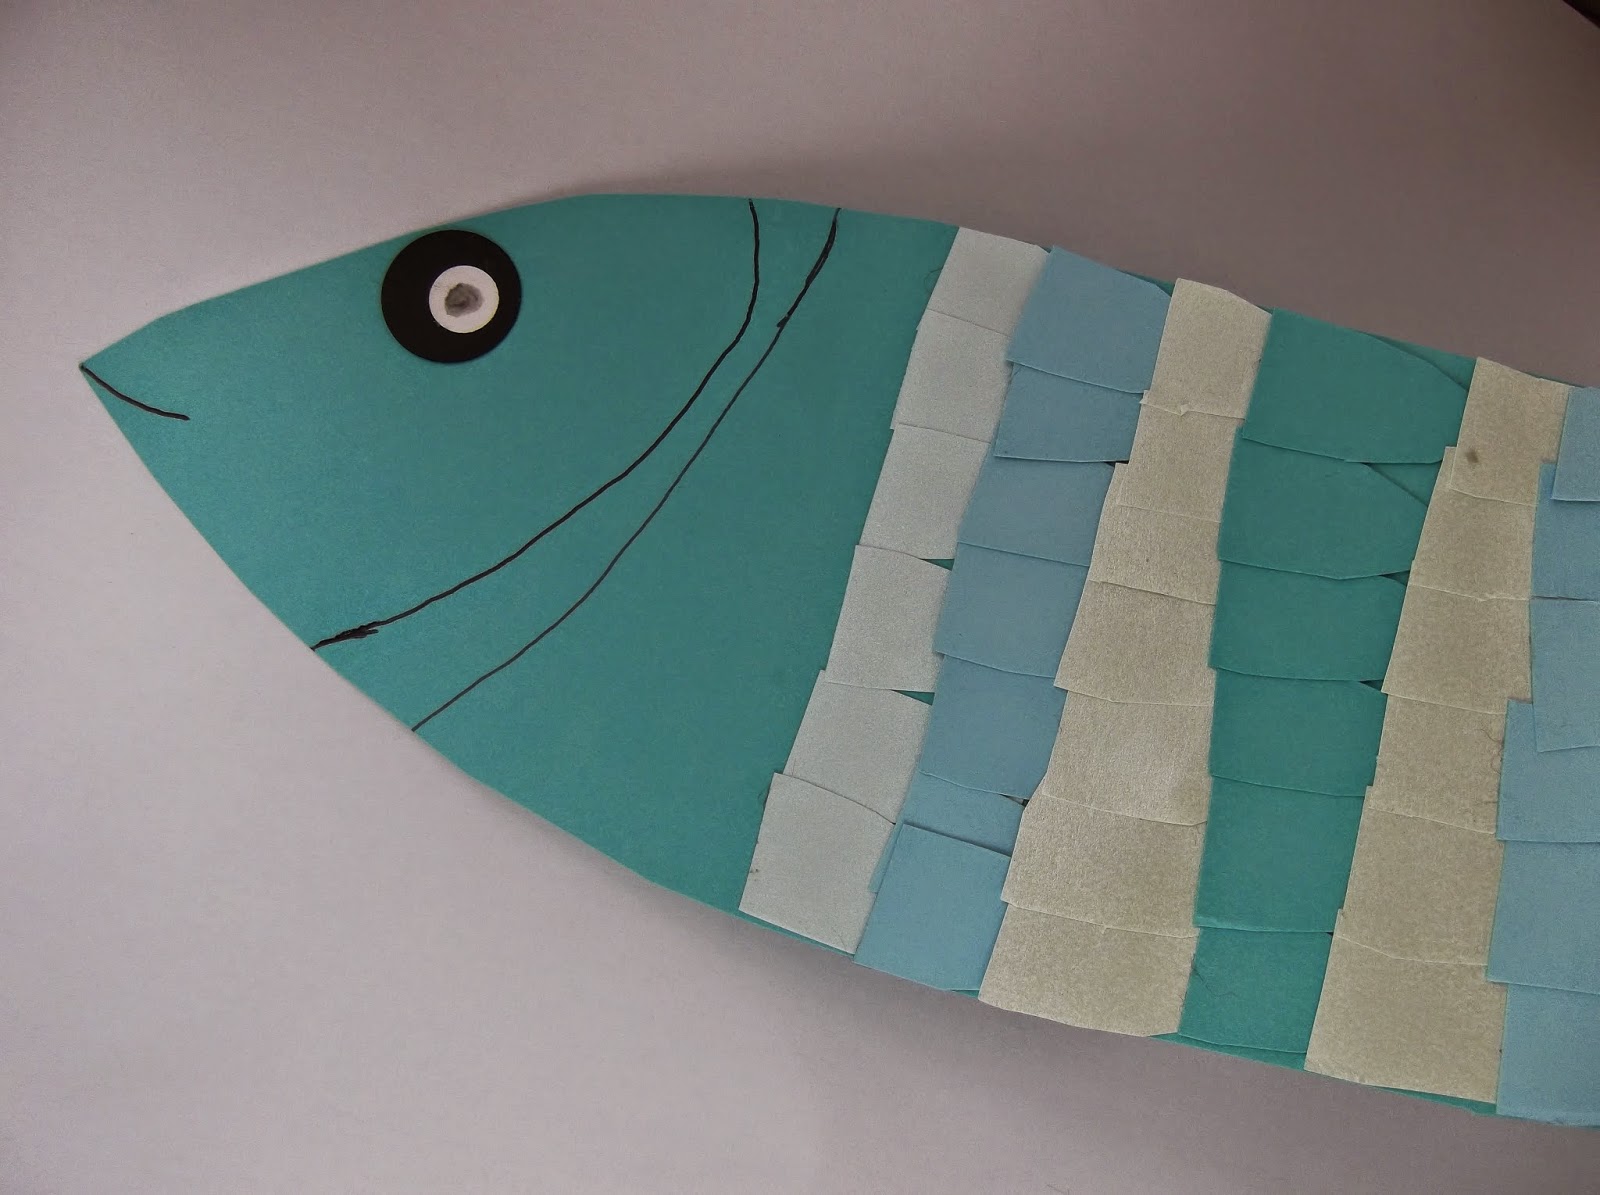
Oh and I really wanted to say a huge thank you to all you bloggers who took the time to congratulate Joe on his fish.  He was so happy to read your messages, So a huge thank you from me, Also from Joe and his mum for making his week! Here is a reminder of his lovely crafty fish!


I will be sharing my Happy news on Happy Friday!  Do pop round to see what makes other bloggers happy or to join in! xx

Wednesday, 11 March 2015

Whatever Wednesday ~ Fishy

Well whatever have you been up to?? 
Just a short one from me today, I thought I would share a few snaps from our little adventure at the weekend!  
Since getting a season ticket for our local sealife centre we have been nearly every weekend, although this weekends reason was because my eldest wanted to go on all the rides that now seem to be open.  


Here she is stroking a starfish!  One thing that is lovely is the interactive rockpool, not interactive like on a pc but good old fashioned, proper interactive, ie getting her hands wet! (isn't it funny how words change their meanings a little in this new techy society!).  

I remember a few years ago the sealife centre visited a preschool I was running, they bought a bath like tank filled with wonderful sea creatures.  It really was quite the experience and apparently it is still something they offer.  So if you have a centre near you it might be worth suggesting your local school or group contacts them to see if they offer the service near you!

On our way out we couldn't resist a quick photo in the giant lego shark.  Here are my girls posing!  strangely enough, climbing inside a large shark with red blood like bricks round the mouth didn't phase my youngest at all!  (lets hope she never actually tries this with a real one!)


Generally I would have said ...'avoid the sealife center, it's far too expensive' (true the day tickets really are costly!) but we were lucky to get a local offer and saved over £40 for the three season tickets and so far we have been 4 times (that's saved us nearly double what we paid) I am now converted tho! We have had so much value from our visits and see something new each time.  
I always thought the cafe was expensive but our cards offer us 20% discount on drinks.  I still won't buy things in the gift shop, even with a discount!  

Over all I am now a huge fan! 
If you don't decide to go a season ticket route I have in the past found fab deals online and I discovered a while back that if you go really late in the day they often just let you in if you just buy a guide book.  It's worth looking around!! 

Do you like to visit the same places? I just love season tickets, there is far less pressure to go for a full day! Just a few hours makes somewhere fresh and exciting rather than feeling you have to get every penny's worth of your visit and slogging out a whole day regardless of how busy it is or even how the weather turns out! 

Well I'm going to leave a linky in case any of you lovely bloggers wish to share something you have been up to this week, doesn't matter what it is (or it wouldn't be whatever Wednesday!!)


Hope you have a lovely week and pop back for Happy Friday and Handmade Monday

xxx

Monday, 9 March 2015

A little Easter Preparation!

This year is going ever so fast isn't it!  I am realising that I am, already, too late to start selling items for Easter that are custom made.  I never know when to start with these things, it seams that crafters advertise Christmas stock for months but as soon as it is gone what next??  Valentines, Mother's day then Easter!  (there is no rest!) but then, with the exception of Fathers day there is a crafty season lul until Christmas again (Halloween is a funny one, people don't give cards or presents so I never really craft for this season)

I have been very fortunate to receive a few custom orders recently as well as the normal Crafty What Nots orders.  I haven't actually launched my One-off boxes yet but I am surprising getting orders for them! The nice things about these boxes is that they are personal to the individual and also I can share progress shots with the customer so I know they are happy beforehand.  

Here is a collage of one of the Mother's day boxes.  There is much more in the box but I don't want to spoil it just in case any of them read my blog!


Another One-off box I have been working on has been for a 3yr old.  So far it is full of spring crafty goodies but I have also been making a colouring book for her.   Here is a little collage of some of the drawings!  What do you think?  I did wonder about making up a few to sell before Easter with a set of crayons (too many ideas!!)


Just a reminder to all you Crafty What Nots fans that next months box orders are due to close on the 15th March.  I'm loving the papers already!!


It feels like my world has been consumed with Crafty Boxes, I am sorry if it becomes a little tedious but I get so excited about them! 

In order to bring a little happiness to my facebook followers I have invented a new game!  It's called Crafty What-bats and is something I used to do a lot as a child.  Here is an example! Each What-bat reveals the name of a page who has interacted and joined in with my page!  (Ooo perhaps I should do one for my blog too!)  It's a great way to share pages and fun too!


Can you guess the name of this page?
Lastly I just want to thank those of you who entered my giveaway on Friday. I collated all the entrants from Facebook, Instagram and my blog and the winner was Emma Gray from FB land.  Here are the images I posted to show how I picked the winner.


Well I had better stop and go and do some tidying!! Argggh!
I will be stopping by Handmade Monday as always!

Have a lovely week and hopefully see you back here for Whatever Wednesday and Happy Friday!

xxx


Friday, 6 March 2015

'Whatever' giveaway

This week I decided to launch a multi social media give-away to win one of my new 'Whatever' boxes!  These boxes have become quite popular and I thought it would be fun to give a lucky reader a box!  Each box is crammed full of crafty goodies and normally retails at £7.50.  Unlike normal Crafty What Nots boxes, these aren't personalised and are ready usually within 24 hours, they really are a lucky dip of crafty wonders.  I am happy to try to incorporate a colour preference if you have one!

I am running this give-away on Facebook and Instagram (I'm useless on Twitter so didn't get that far! lol)  All you need to do to enter is comment below that you wish to be entered... that's it!
I will collate all entrants across each network and select a winner at 8pm on Sunday 8th March!


If you didn't catch my Whatever box unveil then here is my little video of what you might find in yours!!! 


I have been trying to think of my 'Happy Friday' photo this week.  I discovered that my dropbox is incredibly full of photos, however nearly all of them are tutorials or photos of Crafty What Nots boxes so nothing new to show you really.  I usually take loads of family pics of our exciting adventures but my camera, unusually, didn't venture out of my bag all weekend! Apart from a few snaps at the sealife centre!  

I thought I would share this pic instead!  It was a little crafting achievement that I was incredibly pleased with.  I created my own stamp to use with my Crafty What Nots.  I have dabbled in stamp making before but this one worked really well!  I am wondering whether to branch out and make a few but not sure yet!  What do you think?


I am going to link up with Happy Friday so hope to see you there! 

Hope you all have had a happy week and have a super weekend (fingers crossed for better weather!)

xxx