Showing posts with label exploding box. Show all posts

Sunday, 21 September 2014

Craftea afternoons and subscription boxes

Craftea Afternoon

This month I am running 'Exploding Box' workshops.  Here are some lovely crafty ladies being down right creative!  We spent nearly 3 hours making boxes, eating cake and drinking tea  (hence the 'tea' bit in 'craftea'! 


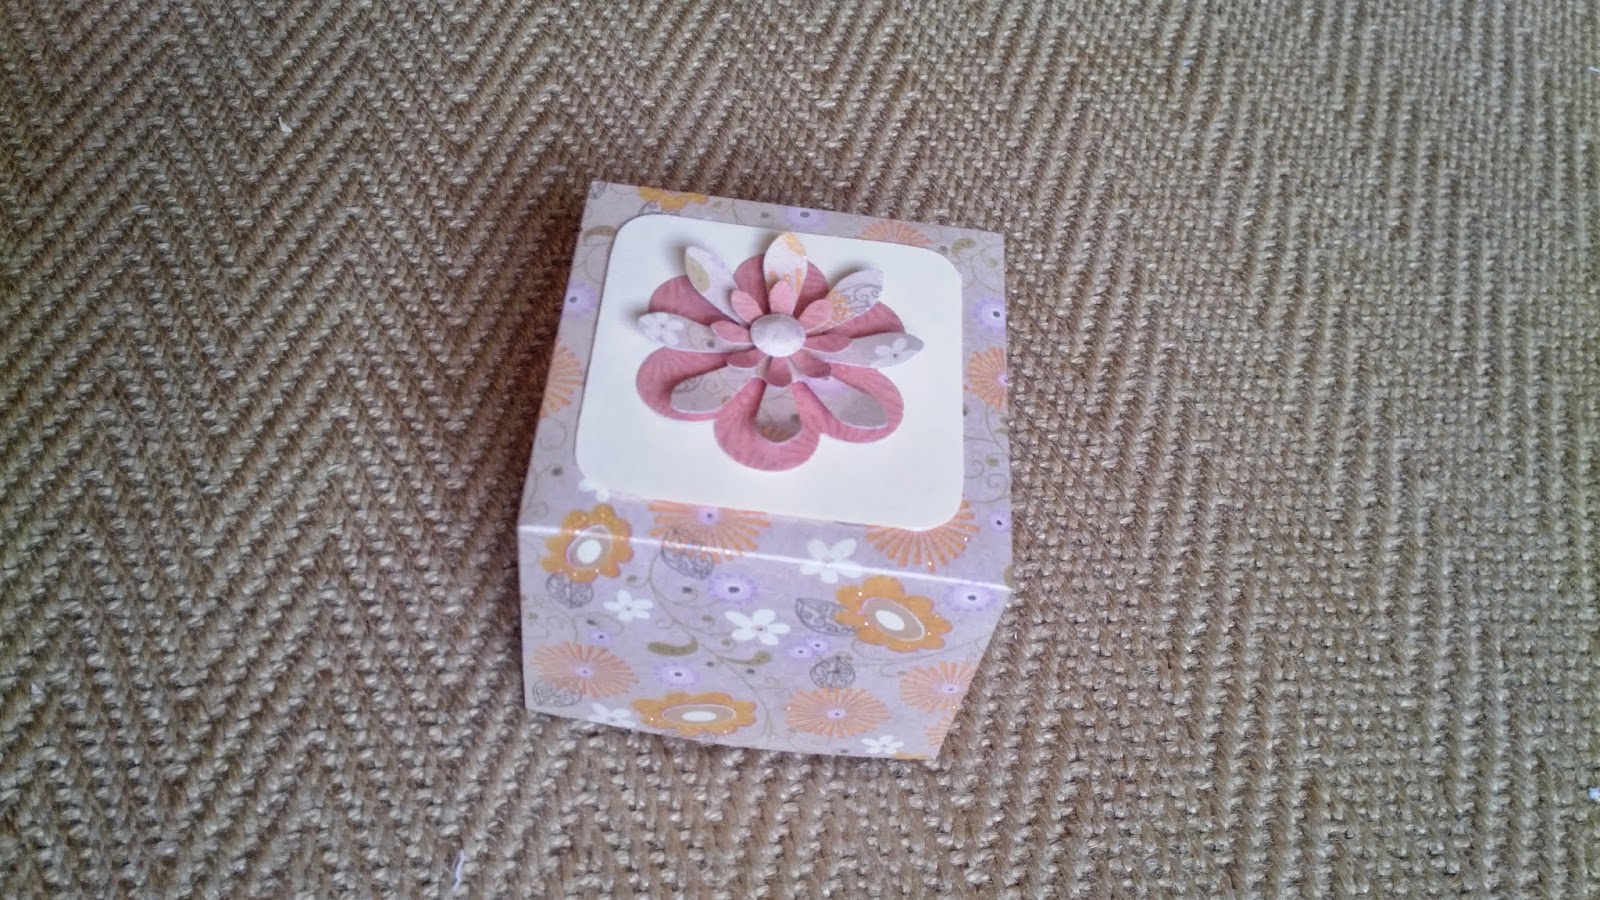
Here is one of the boxes in progress.  


We used the 'Floral Pavilion' papers


Everyone was so pleased with their boxes!  

Despite spending a great deal of time trying to organise myself for the workshop I have also been doing lots of preparation for my new venture.  Big thanks to the lovely bloggers who contacted me about helping out.

I keep umming and arring about blogging about what I am up to!  I don't want to reveal too much in case it all goes terribly wrong!  On the other hand I would like to gauge some reactions I think!  

If you would like to make your own there is a tutorial here as well as some inspiration for other designs xx 

Crafty What Not's!

'Crafty What Not's' are going to be monthly subscription boxes filled with crafty goodies.  Each box will contain a few different crafty projects as well as an inspiration sheets to suggest ideas for using your materials as well as instructions for certain projects if you wish to follow them.  
Above all however, each month will be a surprise, and who doesn't love the idea of surprises? especially when they are crafty!  The only thing you might find out in advance is the name of the box.

The first 'Crafty What Not's' box is called 'Floral Pavilion' and will only be sent out to a few bloggers to review.  I have only a couple left if anyone would be interested in helping out.  It won't cost you a penny, all I need in return is your opinion.  You are welcome to review it on your blog or any other social media (even if you don't like it).  If you would like to join in then please do contact me below.

First boxes go out on the 1st October so I have been busy putting them together.  My biggest problem is not putting too much in each one!  Just too many ideas!

Well better be off to enjoy the sunshine as we never know quite how long it will be around for!

Will be linking up with Handmade Harbour.

xxx

Monday, 26 May 2014

Crafty challenge

 Well happy Monday to all you crafty people, and if your not crafty... well lets face it we are all a little creative!  It may not be with paper and card, glitter or fabric but everyone has a bit hidden in there somewhere!  This week I decided to set myself a creative challenge.  I bought this lovely pad of first edition papers and wondered what could I use it for!  I am sure I not alone in this, often I buy things thinking 'I can't live without that'  but when I get it home I am not at all sure what to do with it.  Crucial craft items get saved for a rainy day and end up collecting dust in the ever expanding universe, that is my craft room!

Here is the pad I bought, 'Desert Blooms'  isn't it just gorgeous!


Well my challenge was to see how many things I could create from this one pack!  Here is what I made....What do you think?  


I made a total of 23 items.  I even had a load of scraps left over so I am sure I could have made a few other bits.  

Here are close up's of my creations. 


               1, Smash book                                  2. Note pad                                  3.  Sticky note folder


   4 Box


 5. Handbag gift box


6-11.  5 mini greeting cards in a box


12.  Pyramid card


Here is another view and below is how it looks flat for posting.


13.  Origami box


14.  Exploding box


Inside box and detail.  The inner flowers bounce around as the box is handled!


15.  Mini album.  Once opened it opens out like below and leave space for 4 mini photos, or some journalling.


16.  Box card.  Here it is open.  It can be folded flat so it can be posted.


Folding the box card flat 


17.  Origami mini album


the album opens up to reveal spaces to journal as well as tabs for photos.


18.  Origami secret note.  Here it is totally folded and secure


open the first layer to reveal a pattern


open it further to reveal the secret note!

19.  Treat pouch.  I didn't take a close up pic of this one or 20-23 heart keyrings.  The keyrings are the only thing that weren't quite finished but I was far too impatient to take a photo and blog!

Below is all the paper I have left!  There are 3 full sheets in there and the rest is mainly just scraps. 


Anyone fancy a challenge like this??? 

Wednesday, 7 May 2014

Exploding boxes tutorial


Wonderful Wednesday...what shall we make today????

Well today's tutorial is how to make an exploding box!  At fist glance it looks like a plain old box but....

...take off the lid and the inside opens out to reveal a cluster of flowers!


You could do all sorts and there are plenty of other designs out the if you search.  This tutorial is just to show you a two level box.


1.  This design only uses 3 sheets of paper.  I have chosen double sided for two of them (these will be the main box) and the third is super glittery!  All the sheets are from the same paper pad and measure 12x12".


2.  Start by measuring 4" in from each corner and then joining the lines up to form 9 even squares.  I have used a pen so you can see the lines but ideally you should either use a pencil or score directly onto the card so that you can't see it when you are finished.


3.  You now need to cut the four corner squares out.  You should be left with this cross shape.


4.  Next take your second piece of paper, this will be the inner box.  This will need to be smaller than the one we have just done so cut your 12x12" paper down to 9x9".  Now measure 3" in from each corner and score along the lines before cutting out the four corner squares like before.


5.  I used a corner punch to round my corners off but you could leave them pointed.  Turn your smaller cross over and attach double sided tape to the middle square.  Now stick the smaller cross into the centre of the bigger one like above.


6.  Now we will need to do the lid.  You will need to cut your paper down to  7 1/8" square.  Next step is to mark out 11/2" in from each corner.  Now score your lines (I have used pen so you can see them)


7.  You need to cut along 4 lines now, one from each corner and going along one edge of each corner square.  Fold all lines well.  Hopefully you should have something like the above picture.


8.  Turn your paper over so the pattern is facing you.  Each corner has now become a tab.  You need to use glue or double sided tape on each of the four tabs and then stick so that the lid is formed like above.


9.  Now get creative! let yourself go wild!  In this box you can see that I cut down the square sections of card I removed from the crosses, cut them down and stuck them on each cross (I turned them around for a coordinating colour)  I also used some of the card we dis-guarded to make flowers.   


I used thin acetate strips to make the flowers pop out in  centre and popped sticky gems in the middle of each flower.


In order to make some of the box panels stand up when open I curled up some card and stuck it behind two of the sections.  This means that when the box is open and sitting on a table it doesn't go completely flat, adding a little more depth.


For the lid I wrapped a ribbon around the edge and then stuck a layered flower in the centre over the seem.

Here are a few other exploding boxes I have made recently as a bit of inspirations.  


This box is filled with photos to flip through!


This box has 9 layers in all, the middle one also has it's own lid so you can hide another little treat in there!