Happy Tuesday crafters!
ORIGAMI BASKETS
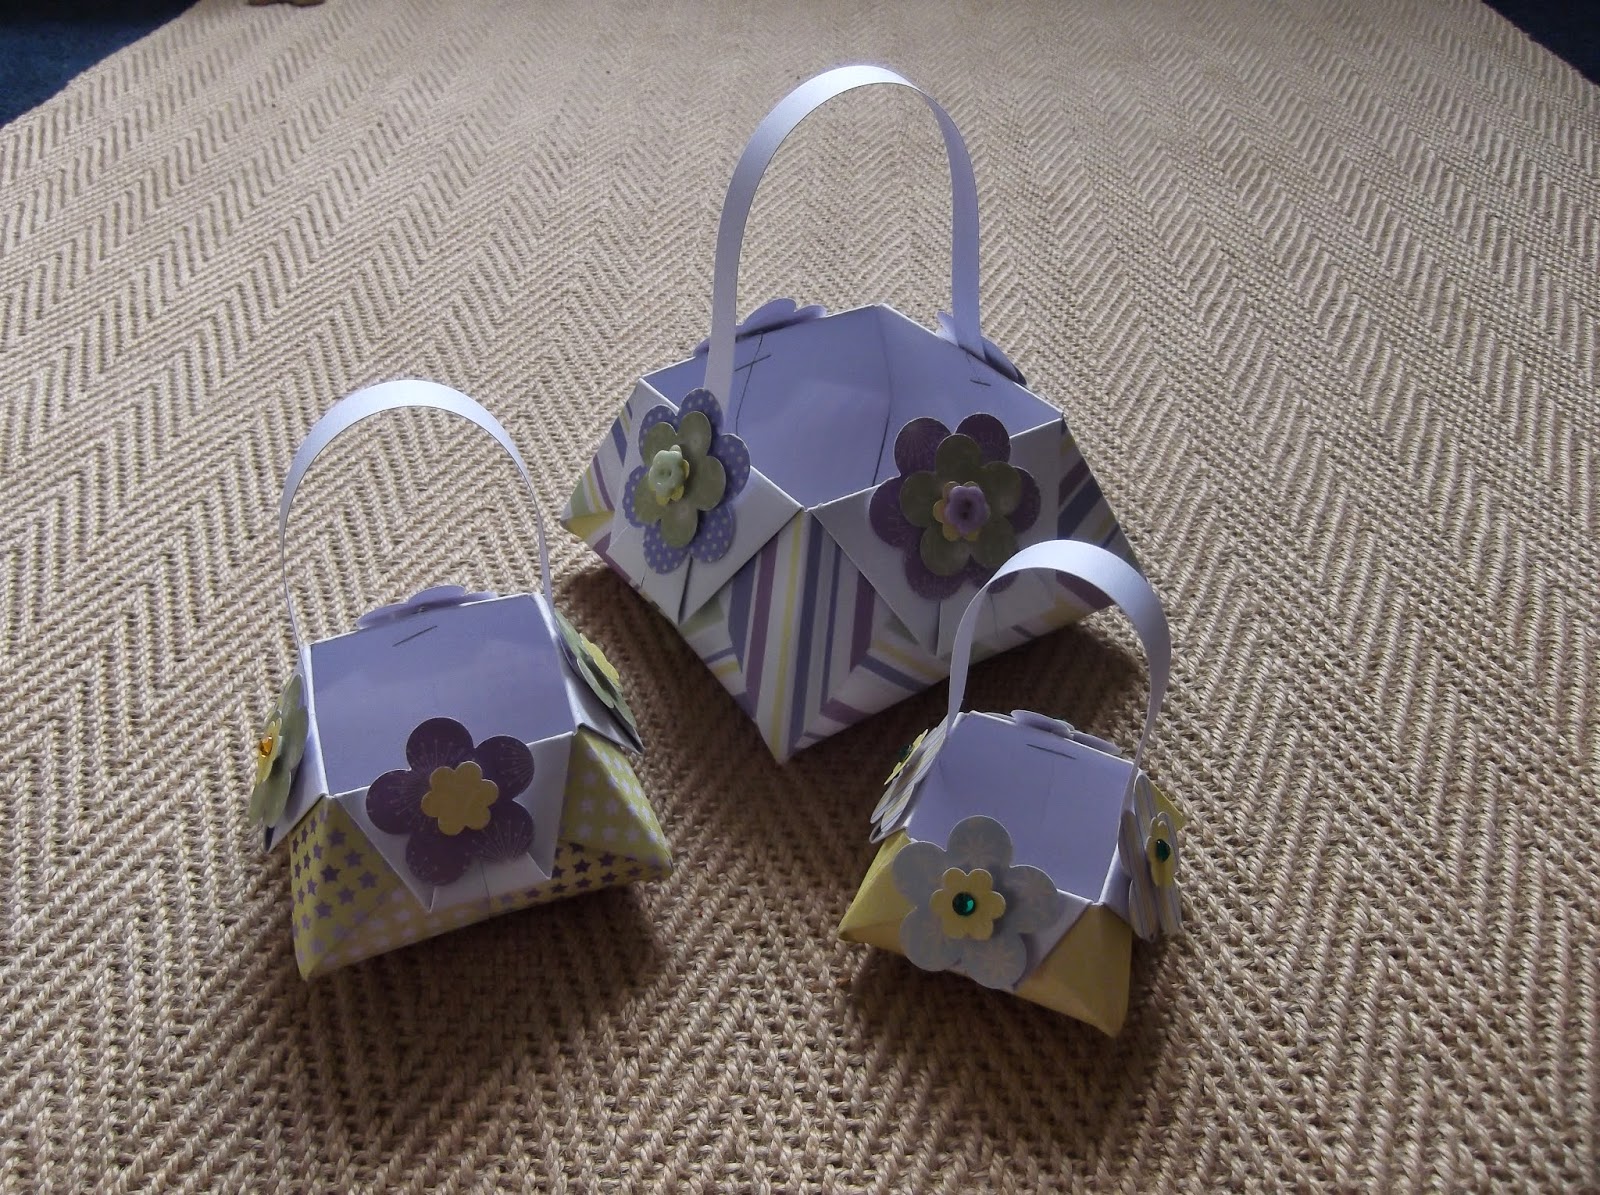
Today's tutorial is how to make this basket! This picture shows 3 sizes. The paper sizes I started with were 12x12", 9x9" and 6x6". I suggest you start with 12"x12" paper as the smaller ones are far more fiddly!
You will also need a long strip of thin card approx an inch wide and around 10" long (this can be cut down depending on how long you will want the handle for your basket!) , a stapler, embellishments, foam pads or glue dots or something else sticky (not cake mix! it doesn't work)
1. Take your chosen square of paper. It is best to use a light weight scrapbook paper. Thicker ones make the many folds much harder.
2. Fold your paper diagonally. White side to white side.
3. (The remaining folds need to be pattern side to pattern side.) Open up your paper and fold in half width ways, open and then repeat lengthways. Finally open the paper again and fold it diagonally (not the fold you did before!) By folding one fold the opposite way round it will make the next step far easier. Your paper, when opened up should now have eight folded sections.
4. This bit is very hard to explain. The aim is to get all four points to the same place. Once you have replicated the above picture position it on the table in front of you so the open points are facing you.
5. Taking the bottom right edge, (front only) you need to fold it so that the edge now follows an imaginary line from the top to bottom point. Repeat with the lower left edge.
6. Turn the whole piece around and repeat the last step. You should have something that looks like a kite now like above.
7. Take the bottom right section (the first piece you folded in step 5) You need to open it carefully, and flatten the top section down like above. Repeat on the left side and then turn the piece again and repeat on both sides.
8. You will notice as you do the last step that you have created a white triangle in the centre of both sides of your piece. You need to fold this up as far as it will go. (it won't reach the top point but reach about 3/4 of the way up to it.) Make sure you do this on both sides.
9. It is hard to show this in a picture but I will try to explain how to achieve the above. With the piece in front of you take the right side panel and flip it over to cover the left hand side. Now turn the piece over and repeat. You should now have reveal two unfolded sections.
10. We are now going to repeat step 5, you will notice however that you already have folds as a guideline and instead of looking like the end of step 5 you will notice that you have created yet another white triangle!
11. Can you guess what you do next? That's right fold the white triangle up like you did in step 8.
12. Turn the piece over and repeat the last two steps. You should now have something that looks like an Abbot hat.
Now rotate the piece 180 degrees ....
13. Carefully you now need to try to open your basket. This can be teased open by pushing against the inner seams.
14 . You can leave your points pointy if you wish. For this tutorial I fold the points up and then using a stapler I attach it to the basket side. Only do this on two opposing sides however for the moment.
You can use Brads instead of staples if you like. I have done this successfully but it can be a little fiddly.
15. Take your strip of card and place one end inside between the triangle and the basket before stapling it. I found, by folding the triangles that there is an edge that the handle will now sit in that stops it moving too much while fixing. Now fix the other side of the handle.
16. Now it is time to unleash all that creativity! I used coordinating papers and punches to make my flowers. I also used small buttons in the centre of this basket. I used sticky gems in the smaller ones in the top pic!
Here is a flower close up!
Well I hope you all get creative now and take some photos of your creations and add them below!
Happy crafting all!
xxxx