
Where has this weekend gone??? I have had quite the busy week planning pretty crafts for the latest Crafty What Nots box, With a love theme I am having terrible trouble narrowing down the options to include! Oh the choices!!!!
I thought it was about time I popped another tutorial your way! Here is a little one on how to make a beaded bracelet. I love the simplicity (it is easy!!! honest!)

Beaded Macramé
bracelet
You will need a
pencil, 2m length of cord and a selection of beads with big enough holes for the cord to pass through.
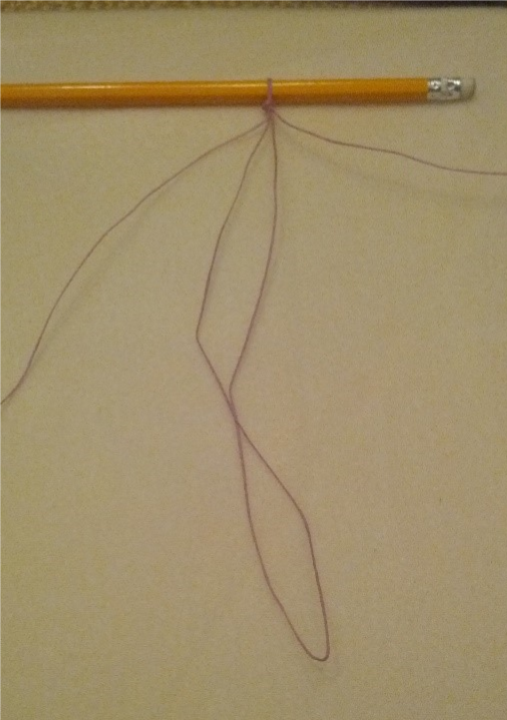
Step 1 – Fold your cord in half and measure 30cm from the fold. Create a loop and knot so you can just fit a pencil through the loop. Lay the threads so that the fold is pointing towards you and the two long ends lay either side of the shorter one.

Step 2 – thread a bead onto the short ends which are still joined at the end. (always keep this length pointing towards you).

Step 3 – take the left thread, pass it under the middle threads and over the right thread.

Step 4 – now take
the right thread, pass it over the middle threads and post it through the left
hand loop so that it travels under the left thread. This is the basic knot we
will use throughout.

Step 5 – gently pull both threads evenly, they should create
a knot which surrounds your first bead.

Step 6 – Using the
same techniques create another knot, this time without a bead. Do this 5 times to create a short knot
length.

Step 7 – add another bead like you did in step 2 and then
repeat steps 3-5. Now knot 5 more knots
without beads. Alternate beads and knots
until your bracelet is long enough to go around your wrist.

Step 8 – once the length is long enough, tie a knot after
the last bead using all 4 threads.
Carefully cut away the short folded thread up to the knot (Your knot
should keep your threads in place, however if you wish to add a little dab of
nail varnish or glue to the knot is will help secure it further.

This last bead is your catch! Post it through the loop you made in step 1
and hey presto! All ready to wear!
Well I will be popping off to link up with Handmade Harbour and see what other lovely bloggers have been up to! I am also linking up to

Have a creative time xxx