Showing posts with label papercrafts. Show all posts

Wednesday, 17 February 2016

Getting ready for a new workshop!

I have been preparing for my first proper craftea afternoon workshop since having Lucy.  We are going to be creating spinner cards! Have you made them before?  These clever little cards require 2 pennies, round foam pads and a little creativity!  It'll be interesting to see how it goes!


This one is going to be great for those who don't like to cut!  it can be done with punches.  I just love the way the alien spins around in a circle. (sorry no video of these in motion I'm afraid) 


Cupcakes and candies


Flying high (looks less of a plane crash when you move it by hand... not sure I thought that one through!)

Have you made spinner cards before?  I will get round to a tutorial at some point.

Jen xx

I'm linking this up to handmade harbour, do pop by to say hi. 


Monday, 15 February 2016

February's Crafty What Nots Unboxinng

Hi there all! Yes I mean you! How have you been?
I have found that time has become an illusion! you think you have loads of it but when it comes to it.... it disappears! But today I find I have 10 minutes to do a little blog post! yeah!

I thought I would share my first proper unboxing!

I was a little brave this month!  I created an unboxing video of February's Crafty What Nots box!! Ok I know that that in itself isn't really very brave, but I decided I would talk on it.. that was scary!
Here is it is, what do you reckon? Should I do this again next month?  I did think I should add the finished makes on the end too so people could see what they are making.


Another new thing I featured this month were QR codes, I added them for exclusive Crafty subscribers on one of the more difficult makes.  I also added one that is available to the public but as some inspiration of something that could be made!

I thought more videos would help, especially on origami tutorials!  If you would like to see any of my videos so far then here is my YouTube channel.

I will leave you with images of the makes that were included in this months box.  If you would like to give a box ago then visit www.craftywhatnots.com and see what they are all about, read reviews and view buying options.  You can buy just one box or subscribe for a discount.  I also have kit boxes available too!  The deadline for orders is the 15th of each month.


I will be linking up with Handmade Monday as usual so do pop by to visit some fantastic blogs!


Monday, 25 January 2016

Arrow tutorial


This week I thought I would share a video on how to make these really cute little arrows!  A perfect use to use up those little paper scraps.


Just click on the video below.


What do you think? Do you like the videos?? I have a whole list of ones to create! 

What have you been up to this week?
I will be popping by to the lovely Lucy Blossom crafts for Handmade Monday, do pop by and celebrate her 1st Handmade Monday birthday!

Sunday, 19 October 2014

3d pop up flower tutorial

Well Hi-di-hi there lovely readers!   I do hope you have been enjoying your weekend.  We had such a lovely day wandering around the beautiful grounds of Mottisfont House, if any of you haven't been but live near Southampton it is a total must!  Their Christmas extravaganza (the Nutcracker) is something we are all very excited about if last years events is anything to go by!


Here are my little cherubs running on the lawn with the football!  Such a beautiful day!

Now as much as I could bore you all endlessly with National trust photos I thought I would share a mini tutorial with you for a flower I created recently.  I was a bit of an experiment but I loved the finish!

I used the super sized flower punch and punched out a flower in a patterned paper.


Step 1 - fold the flower in half, open, turn it a fraction and fold again.  The aim is to make sure each petal and each gap between the petals have a fold.  (see image below)


Step 2 - After completing all your folds you now need to fold in half and then in half again (it doesn't matter which way round the paper is or whether the first fold was through a petal etc)


Step 3 -  cut off the corner (I cut off about 5mm diagonally)


Step 4 - Create valley and mountain folds all around your flower.  Here I made all the folds in the petals mountain folds but it looks just as great the other way round!


Step 5 - I used the next size down flower punch and punched out a flower from scrap paper. (Your not going to see it)  Cover in tape and glue! (I think glue dots or even hot melt glue would work even better)


Step 6 - This is a little tricky and if you have punched out a smaller flower quite fiddly!)  you need to push all your petals in at the same time, this will close up the hole you created.   Stick this on the scrap flower covered in glue....beware, you need to hold for a while!  I found that as the flower naturally wants to return to its original shape you need to make sure the glue is set first!


Step 7 - I put some extra glue in the centre (just to be sure) and then stuck a very tiny flower over it to hide the joins!


Hey pretso!  a really cute 3d scrap flower!  Great for using up oddments!


Here is another flower I created!  this one has valley folds in each of the petals!


Hope you love making these little flowers of mine.  For an experiment I was really pleased!

Good luck!  

Well off to Handmade harbour as always for a lookie at what everyone has been up to.

xxx

Wednesday, 15 October 2014

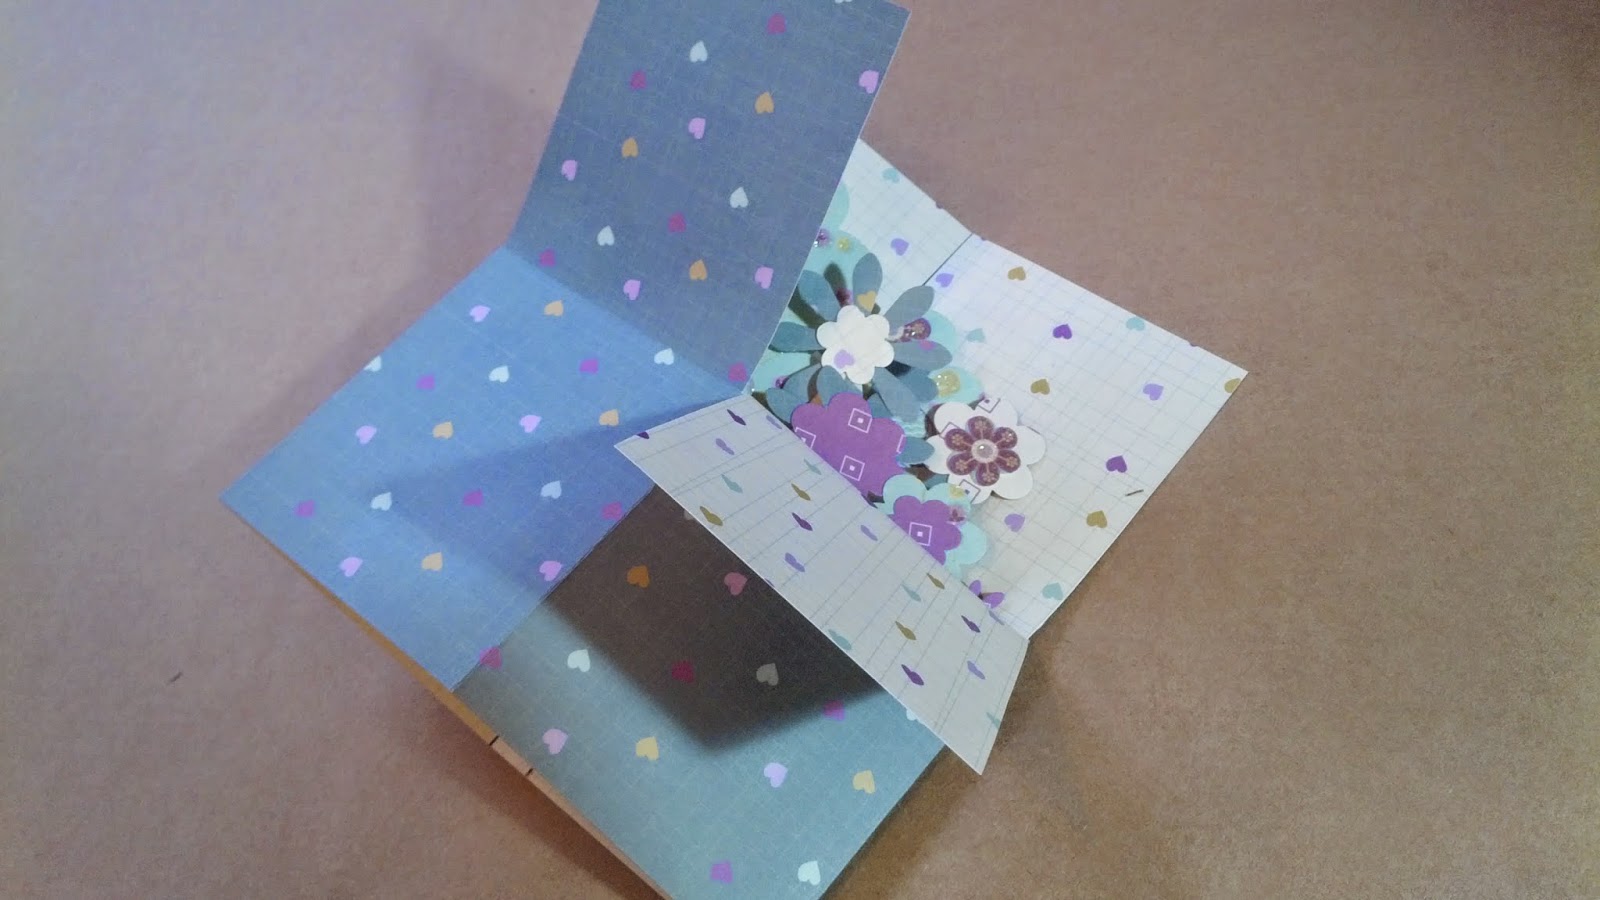
Exploding box card tutorial

I thought I would share a new tutorial with you, I am doing this as a workshop on Friday and figured this would be a good opportunity to share it with you all.

Exploding pop-up card


Step 1 - For this tutorial I started with a 12x12" sheet of double sided scrapbook paper.  I firstly cut down my sheet to 29x15cm.  I put the rest to one side ready for later on.  Next you need to mark out 4 lines 7cm apart, this will leave a 1cm strip at the end.  (I have used pen here so you can see, I suggest that you just score the lines as you will need to score them anyway.  If you need lines maybe use a pencil)


Step 2 - Fold along each of the lines you drew in step 1.


Step 3 - mark 15cm down the vertical edges.  Join these marks up although do not score through the section closest to the 1cm strip.  (see image above)


Step 4 - Cut down each of the 4 vertical lines down as far as the middle line your scored in the last step.  You can also cut out the top section of the narrow strip all together (this will be your tab)


Step 5 - Cut out 3 strips of 9x5cm paper


Step 6 - Mark 1cm in from both sides and fold like the above image.


Step 7 - Choose which side you don't want to see and put a strip of double sided tape along the top.


Step 8 - Attach your flowers, stems and leaves.  You will need to make sure they are all facing away from you as you are working on the reverse of your design.


Step 9 - Once you are finished attach a scrap of paper on top of the remaining tape so that it doesn't stick to something it shoudn't later on.


Here is the front for one of my panels.


Step 10 - place a strip of double sided tape along the left tab of one of your panels.  This needs to be a panel with the most height as this will be at the back of your card.


Step 11- Attach your panel, face down so the tab sticks approximately 1cm from the right edge of the second section in from the right.  The top of your panel needs to be level with the middle line you scored.


Here is the panel folded back on itself.


Step 12 - Repeat the last step with the next two panels.  I have put the front panel a little lower to hide the panels behind.


Step 13 - Attach double sided tape to the right side of each of your panels and the tab from your larger piece of paper.


Step 14 - Well fingers crossed this will work alright! You need to fold the larger piece of paper in half.  The panels inside will stick to the top section and the main paper tab will also stick to the top.


Now you can fold down three of the side panels (not the one that you didn't score, this is the back panel)


Here is the box opening up.


Ta Da!  I haven't quite finished this one yet, I still have the side panels to decorate but I'm getting there!


Monday, 6 October 2014

Tissue paper Pom-Pom tutorial

Just thought I would pop this little tutorial on.  I was having an experiment the other night to see what I could make from some tissue paper!  I made these gorgeous paper pom-poms!


First you will need a standard sheet of tissue paper, some string or twine and scissors.  An ink pad is optional.


Step 1 - I used half the sheet of tissue paper, so cut in half and put the other half aside.  First off you need to fold your tissue paper in half width ways


Step 2 - fold in half again


Step 3 - Fold in half again!


Step 4 - now fold your tissue paper the other way to make a smallish rectangle


Step 5 - you now need to concertina fold your tissue paper up, each fold should be between 1-2cm


Step 6 - Tie your thread around the middle of your tissue paper.  It doesn't need to be too tight as it will easily hold it's shape later on.


Step 7 - Cut the ends into points like below


Step 8 - Gently open out one side of your concertina and ease one layer back towards the middle (this can be quite tricky.  Don't worry too much if is tears as this shouldn't be too noticeable.


Step 9 turn your piece over and repeat on the other side.  Reapeat this until one half of your concertina is fully opened up


Step 10 - Now repeat on the other side, making your pom-pom.  If you used ink you should be able to see a coloured tinge to the edges.  Unfortunately for my demo I used a really light colour which didn't show up too well.  I tried with a darker one and that worked far better.


I think I may make pom-poms from all my tissue paper now!  I love ideas for recycling packaging.  No shoe box will be safe!

xxx