Showing posts with label crafty parent. Show all posts

Friday, 5 January 2018

Parenting the crafty way #6

Well Hello there.  I don't know about you but sometimes children totally confound me.  I have worked with children for over 10 years before I stopped to extend my family.  I have had the pleasure to work with children from 2 to 18 and what have I found?  They are all totally different.

Now I thought all that practise would make parenting a doddle!  In fact my eldest was pretty easy going on the whole, and she has so far survived to see 16, not taken drugs, had a boyfriend or become a smoking obsessed alcoholic!  YAY!  (huge win)  So when it came to child number 2 I thought, 'hey man, I totally got this!'
OMG how wrong was I!

Well on the plus side not only has number 2 reached 5 years old and started school in one piece but we also went on to have a number 3!

Now I don't want to go into too many details, but to say that the last few years with number 2 has been very difficult for me is a little bit of an understatment.  I've had to deal with impressive tantrums and child who is so stubborn she will deny herself things she is desperate for just so she can be in charge or right!

As parents it is so easy to blame yourself for being a bad parent, that we did something wrong.  This isn't true!  At least I know this isn't true but I find I blame myself for so much.  We have been on a few different courses and spoken to several professionals to help us be the best we can, but still things have been a bit off.

All my other crafty parenting posts have been as a result of these courses.  I had been trying to create environments for my young ones that promotes praise and pride in their achievements as well as a way to express emotions and explore their world.  Now generally these things have been positive and we still utalise a few, especially the wow wall (although this has had a make over, so more about that another time!)

Today though I felt I really had to share my latest idea.  I realised earlier this week that when little 2 has a tantrum and hits out she really isn't happy about it, in fact she is in such torment with her emotions that a tantrum is exhausting and traumatic for her.  I've tried many different systems and theories to help her but nothing really seems to work.  So thinking cap on, this is what I did!

The calm spot

Yesterday I bought lots of exciting goodies which I popped in a new bag.  The bag contained items I felt might help her feel calm, safe and distract her.  There was a squeezy  ball, a fidget spinner and a fidget ring, a bendy snake thing, a mirror (not glass) and a really soft owl.  I didn't get anything that was either easy to break or would cause damage if thrown)


I introduced the bag to her by taking her to a little corner in my wardrobe and telling her that when we send her to time out it isn't because we are cross with her but to help her calm down.  I followed by telling her that I could see how upsetting her being cross was for her and thought maybe, instead of a time out she could have a clam down place, somewhere special for her to hide and calm herself down.

So, keen on this idea she helped me decorate the space and get it all ready.  She has cushions and a blanket to lie on, fairy lights on the ceiling and we hung the mirror up so she can see her face and check if she looks calm or not.


I also thought I would get her some ear muffs as sound sometimes bothers her as well as something to blow.  I wondered about the traditional whoopy cushions but they are full of foam now and self inflate!  (why?  well taking deep breaths is a good way to try to calm down and I thought by inflating a whoopy cushion she would need deep breaths and then there is a payoff of sitting on it and making a funny noise!)

Well so far she has been to her calm spot twice and I have to say she has enjoyed her space.  Fingers crossed it helps her.  Will keep you up to date!

Do you have any tantrum related good tips?

Next post will be something crafty but really wanted to share this with you.  If you got to the end congratulations... sorry it was a bit wordier than usual!

Jen xx


Tuesday, 26 July 2016

Trying to be a Good Parent ~ the crafty way #5

Just popping by to tell you about a little hack I created recently to entertain my youngest at the table.  Lucy, just recently turned 1 and until now Duplo has been something to suck, chew or generally lob at people or on the floor.  I figure it was time to change this! (in a developmentally appropriate way of course!) 
We have a couple of smaller base plates so with zip ties at hand I attached one of these to the top of her highchair tray.  I then rested several bricks on the table next to her to take as she wished.  I tried filling  a bucket and attaching this but she just upended it.  


I was very close to thinking this may actually not be the best of ideas when.... all of a sudden she started to build! she discovered the bricks attached and rather than destruct-a-girl she started to construct.  

This video is of the first time she actually made something.  (please feel free to skip. I was being a bit of a proud mum and videoed far too long! (a couple of minutes seems an age when your looking back!) She actually sat and played for an hour! I was so gobsmacked that it entertained her for that long, she was completely engrossed.

)


Anyhow since the video was taken Lucy has settled on one particular style, she builds lines, she claps each time in total excitement (as little ones do)  It's so lovely to see creativity, even if it really is in its infancy.


One warning if you do this at home, make sure you wash any spills under a tap!  I found using a wet wipe around the little bumps just made more mess!

One suggestion a friend of mine made was to glue Duplo to the base of bowls or cups to keep them in place.  Think this is a fab idea (although Lucy will pull them up now and make a line with them so wouldn't work anymore).  

Well that's all from me this week. I'd better get on with all my illustrating.  Until then I will be popping by Handmade Monday as always to say hi.

Jen xx

Monday, 13 June 2016

Trying to be a Good Parent ~ The Crafty Way #4

In my garden I have a beautiful decked area which up until this year I really hadn't utilised.  It is quite new as the old one had rotten through.  It has been so lovely to wander onto but not so practical for the kids to be unattended.  Don't get me wrong, there is loads of space to run around but the handrail had large spaces underneath which meant littlest could go plummeting off the edge in her baby walker (not good!).

I wanted to share with you my practical (and possibly not so practical) solutions for the space under the hand rail.


Giant abacus


String art


Beaded wire things (sorry that wasn't v technical!)


Lastly this is my latest creation, a water play station,  We had been saving plastic bottles for ages and I had this vision and I'm actually really pleased with how it turned out.  What do you think?

I hope you have a lovely week. 

I will be popping by Handmade Monday as usual so do pop by and see some lovely blogs xx

Monday, 23 May 2016

Trying to be a good parent ~ The crafty way #3

This weekend I have been super busy getting creative! I thought I would share with you my first creation.

In order to keep Lucy in the living room I created this little barricade.  I needed it to be low enough for Emily to climb over but high enough that the baby couldn't escape and also noticeable enough so us adults, in our dazed state didn't go tripping over it!

The board lifts into place and sits in the gap where the door opens (by the hinges, this helps keep the door open as well so no squished fingers!)  the other side I fixed a scrap bit of wood to the door sill.

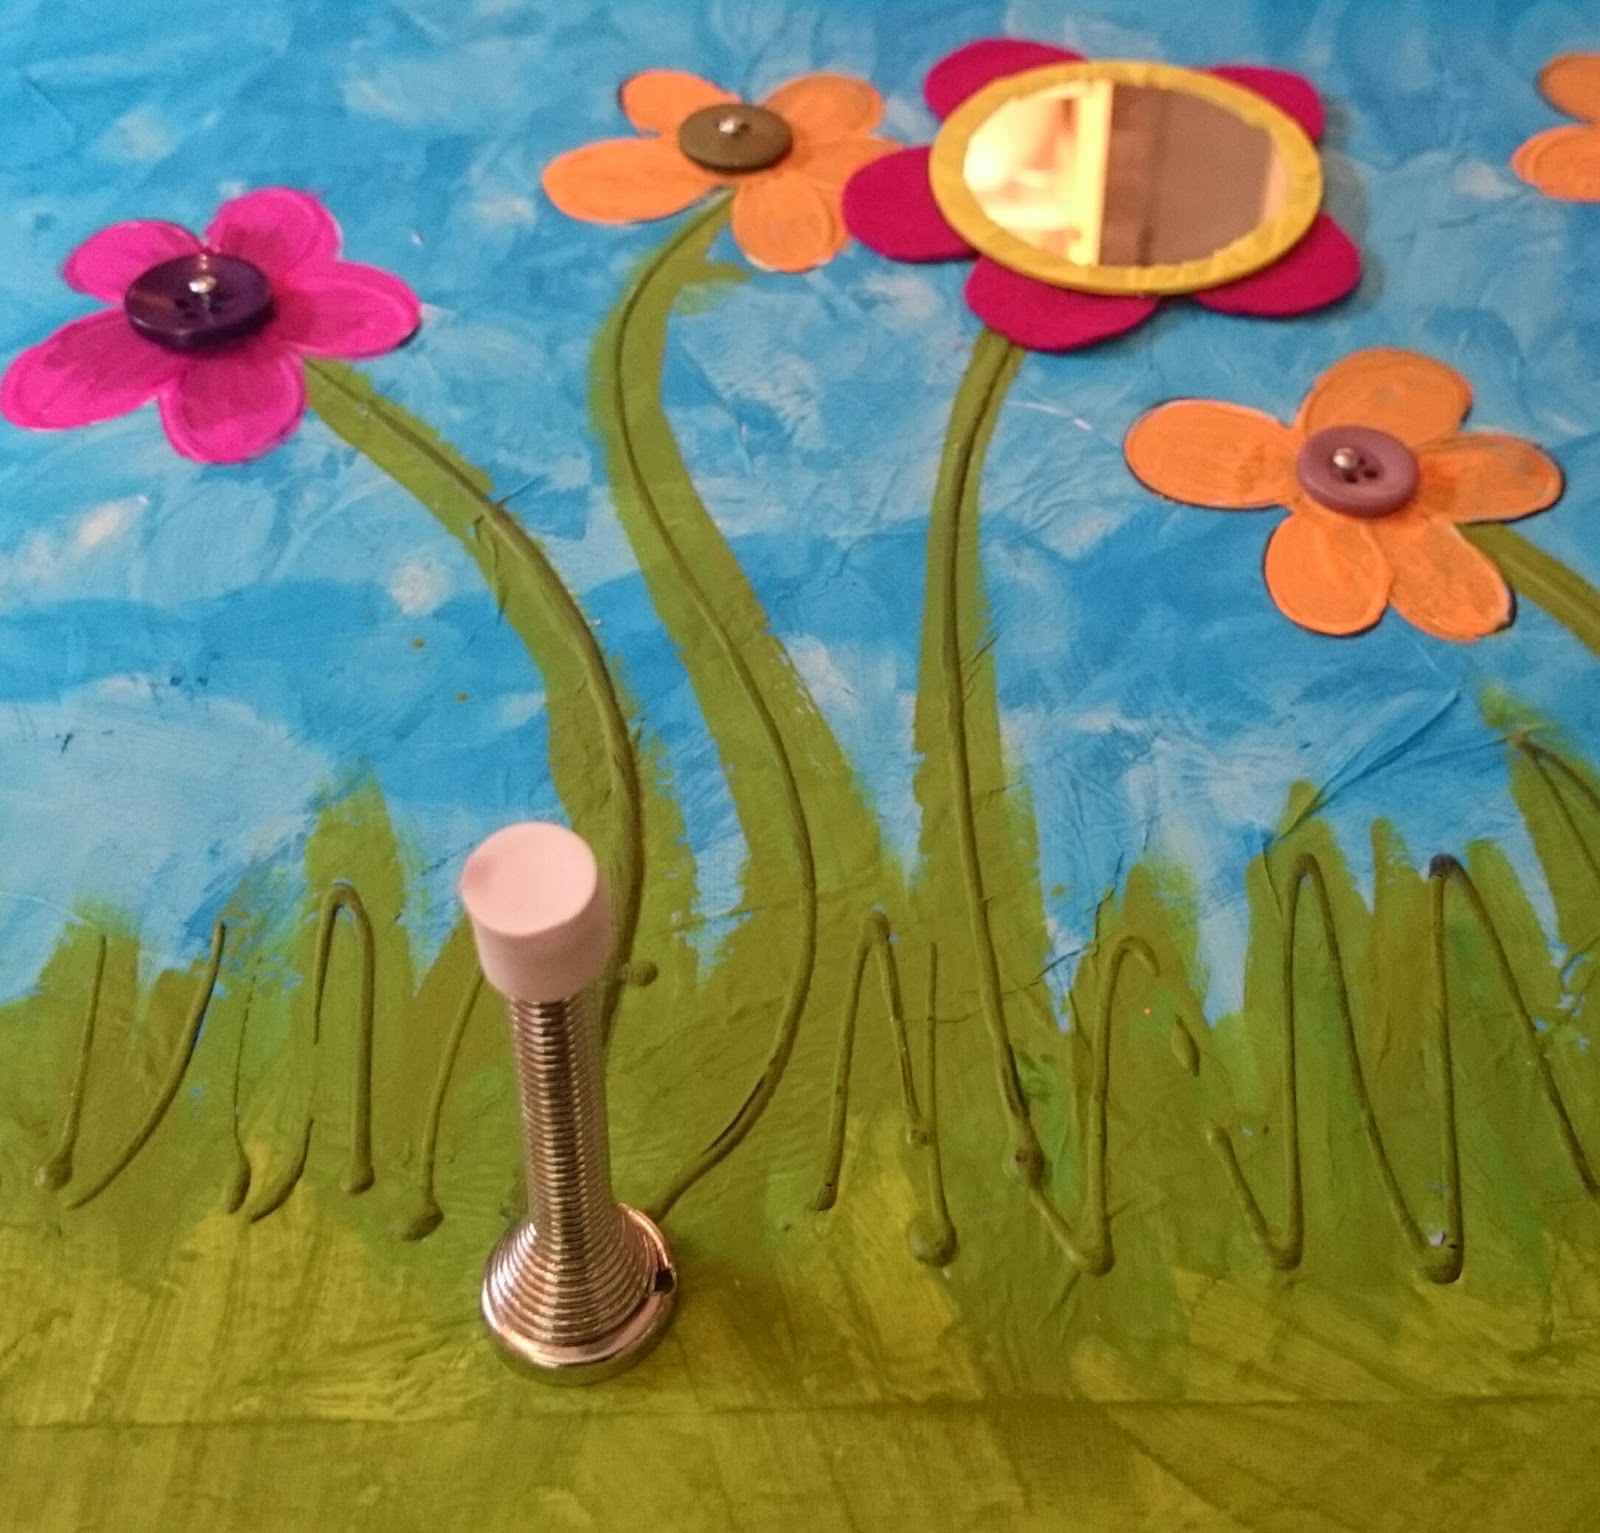
The first thing I did after cutting the board to size was to cover it in white tissue paper and use wide tape around all the edges.  I used a 3d glue to draw the flowers.  I was very liberal with it so that it gave it lots of texture. once dried you could feel all the petals and stems.  Very tactile!


Next I grabbed my new Dylusion paints and started to add colour. I actually quite liked it at this stage.  The tissue paper gave the background such a wonderful colour.  You can see the black lines leaving a bit of shadow here now they have been painted over.


I got busy painting the flowers, trying to keep things bold and fun.  Once I had finished with the colour I added some glossy accents to highlight some of the petals and add even more texture.


Now for the fun bit! I cut out petal shapes and glued them to one of the flowers then added a round mirror to the middle (found in the range) I went round the edge of the mirror with washi tape before gluing just to make sure the edges were as safe as possible.  I added buttons to flower middles (using nails to secure them) and added those fun (yet very noisy) door stops.  I also upcycled a pair of old jeans to create a cushioned ridge along the top.


Hey presto, all finished.  Now add children and away you go (honestly I could escape into another room!)


What have you been up to this week?  I have another couple of exciting parenting type posts lined up, one about reward charts and the other about how to make an outdoor abacus so don't forget to follow me so you don't miss out!

I will be popping by Homemade Monday as usual as well as Creative Monday so why not come and say hi!

Jenny xx 


Monday, 2 May 2016

Trying to be a Good Parent - The Crafty Way #2

I thought it was about time I show you another of my 'crafty' parenting tricks.  If you missed #1 then pop by and see my 'well done' wall here.

I don't know about you but I love lists, particularly ones that are useful and I can see at a glance!  I had this unsightly door in my kitchen that I really felt needed a makeover!

I popped to our local DIY shop and bought a tin of blackboard paint (it is cheaper online but I wanted to use it straight away and patience is not one of my strong points!) This one is actually magnetic, don't get too excited though, it only really works for really large light magnets!


I took the door off it's hinges, lay it on the table and got to covering it in gloopy black paint! If your thinking of doing this use a roller, nothing worse that brush strokes!

Once I had done a few coats and it was all dry I rehung the door (it was a very light door thankfully) and got to work with my chalk pen.

Here is the finished door.


The door has evolved over time as we have got used to it.  It started as just a to-do list and shopping list.  I added 4 circles more recently so we could show how we are feeling, it;s a good way for my middle one to explain her emotions.  (she drew daddy's emotion yesterday, he has three noses or rather to be exact two nostrils and a nose!)

We are also doing a parenting course (as I know I mentioned before) and one thing we had to do was devise some house rules.  This actually resulted in many arguments so in the end we settled with the simple 'We take care of people and things'.
The lowest section is a picture frame for the kids to draw in. (it's the most accessible area for them)
I am sure it will be filled with works of chalking genius in no time.

The thing I love most about this board is shopping list.  I know I can't take it with me, I don't have a big enough bag! All I do is take a photo of the shopping part of the door and hey presto I have my list to go without wasting paper!  The shopping list is always kept up to date as we add to it whenever things are out or low.

A word on chalks! I used this chalk pen from Dovecraft to do all the things that I wanted to remain relatively permanent.  It is so smooth to write with and you can easily wipe over to remove normal chalk marks without this being rubbed away!  I have a bowl of normal chalks near the board so we can always add the to board and rub away as needed.


I actually have a few of these pens in stock as my wholesaler requires minimum ordering so if you are interested in one you can buy one here.  The price is reduced down to £2 but I only have 5 left.

I am desperate to for other things to cover in blackboard paint now! 

I am off to share my blog over at Handmade Monday and Creative Mondays, do feel free to pop over and see a few great blogs!

Jenny xxx


Friday, 11 March 2016

Trying to be a good parent ... the crafty way! #1

Having three children has been a shock to my system! I am constantly sleep deprived and exhausted and trying to remain enthusiastic and supportive is difficult with three very different girls!  Not that I am moaning, just setting the scene for my emotional state over the last year or so.  In short it has been difficult but I seem to be making a few breakthroughs and parenting is becoming more enjoyable!!

Now I won't go into all the joys of parenthood the constant demands for food, nappies, food, playing oh and did I mention food? There are many people who blog many times over how hard or easy parenting is, how they have reached a breakthrough and now have a model child or how they have decided it is alright to hate being a parent etc etc etc.  My blog was never designed for that, first and formost it is crafty related!  (you can all a sigh in relief now!)

So in true crafty form I thought I would share with you a few things I have done with or for my kiddies which has in one way or another enriched our lives and made parenting a little more fun!

First up I wanted to share my 'Look what we have done' wall (I still need to work on the name!)


I realised that dinner times could sometimes go a bit quiet as conversation died down a bit so I started to hang a few pictures on the wall to put the children's work in.  This also meant that I didn't have random paintings scattered round the house!

The wall behind the dining table was a little .... boring!


So i started to add a few frames.  These ones were cheap black framed ones from the Range, nothing fancy at all.


After I had put up all the frames I wanted I then masking taped around the edge and set about with the chalkboard paint to make the frame.  I started with a solid frame but then added a wavy outer edge.  Lastly I used a permanent marker and started to doodle round the edge of the frame.  From a distance it looks fab but when you look closely you can read all sorts of encouraging words and phrases.


Now at dinner time we have lots to chat about especially as there is always something new popping up on the wall!  I love the fact the girl have a place to show off their achievements.  Currently the wall contains notes of praise and certificates, photos, fun art and even the babies first hand print art!  So lots to see.


Oh and it looks a bit grand and funky! Much more exciting that that boring old wall!

Next time I will show you some calming down resources we made!

until next time.

Jen xx

I will of course be popping by to Handmade Monday and sharing my little post.